文章目录
- 1、简介
- 1.1 node
- 1.2 Protobuf
- 2、下载和安装
- 2.1 node
- 2.2 Protobuf
- 2.2.1 安装
- 2.2.2 工具
- 3、node 代码示例
- 3.1 HTTP
- 3.2 UDP单播
- 3.4 UDP广播
- 4、Protobuf 代码示例
- 4.1 例子: awesome.proto
- 4.1.1 加载.proto文件方式
- 4.1.2 加载.json文件方式
- 4.1.3 加载.js文件方式
- 4.2 例子:account.proto
- 4.2.1 create(...)创建对象
- 4.2.2 fromObject(...)创建对象
- 4.3 例子:hello.proto + udp
- 4.3.1 服务端:yxy_server.js
- 4.3.2 客户端:yxy_client.js
- 4.4 例子:user.proto + tcp
- 4.4.1 服务端:yxy_tcpserver.js
- 4.4.2 客户端:yxy_tcpclient.js
- 结语
1、简介
1.1 node
Node.js 是一个开源的、跨平台的 JavaScript 运行时环境。
Node.js 是一个开源和跨平台的 JavaScript 运行时环境。 它是几乎任何类型项目的流行工具!
Node.js 在浏览器之外运行 V8 JavaScript 引擎(Google Chrome 的内核)。 这使得 Node.js 非常高效。
Node.js 应用在单个进程中运行,无需为每个请求创建新线程。 Node.js 在其标准库中提供了一组异步 I/O 原语,以防止 JavaScript 代码阻塞,并且通常,Node.js 中的库是使用非阻塞范例编写的,这使得阻塞行为成为异常而不是常态。
1.2 Protobuf
Protobuf 是一种用于 序列化 和 反序列化 对象的格式规范(rpc 通信协议)。
Protobuf 与 非结构化格式(如 JSON、XML)最大的区别在于,你必须为 protobufs 定义数据类型,最常用的方式是定义 .proto 文件。

Google Protocol Buffer( 简称 Protobuf) 是 Google 公司内部的混合语言数据标准,目前已经正在使用的有超过 48,162 种报文格式定义和超过 12,183 个 .proto 文件。他们用于 RPC 系统和持续数据存储系统。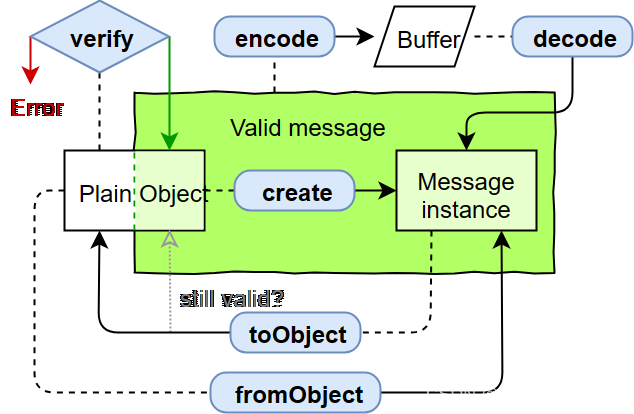
Google Protocol Buffers 是一种轻便高效的结构化数据存储格式,可以用于结构化数据串行化,或者说序列化。它很适合做数据存储或 RPC 数据交换格式。可用于通讯协议、数据存储等领域的语言无关、平台无关、可扩展的序列化结构数据格式。目前提供了 C++、Java、Python 三种语言的 API(即时通讯网注:Protobuf官方工程主页上显示的已支持的开发语言多达10种,分别有:C++、Java、Python、Objective-C、C#、JavaNano、JavaScript、Ruby、Go、PHP,基本上主流的语言都已支持.
2、下载和安装
2.1 node
https://nodejs.org/zh-cn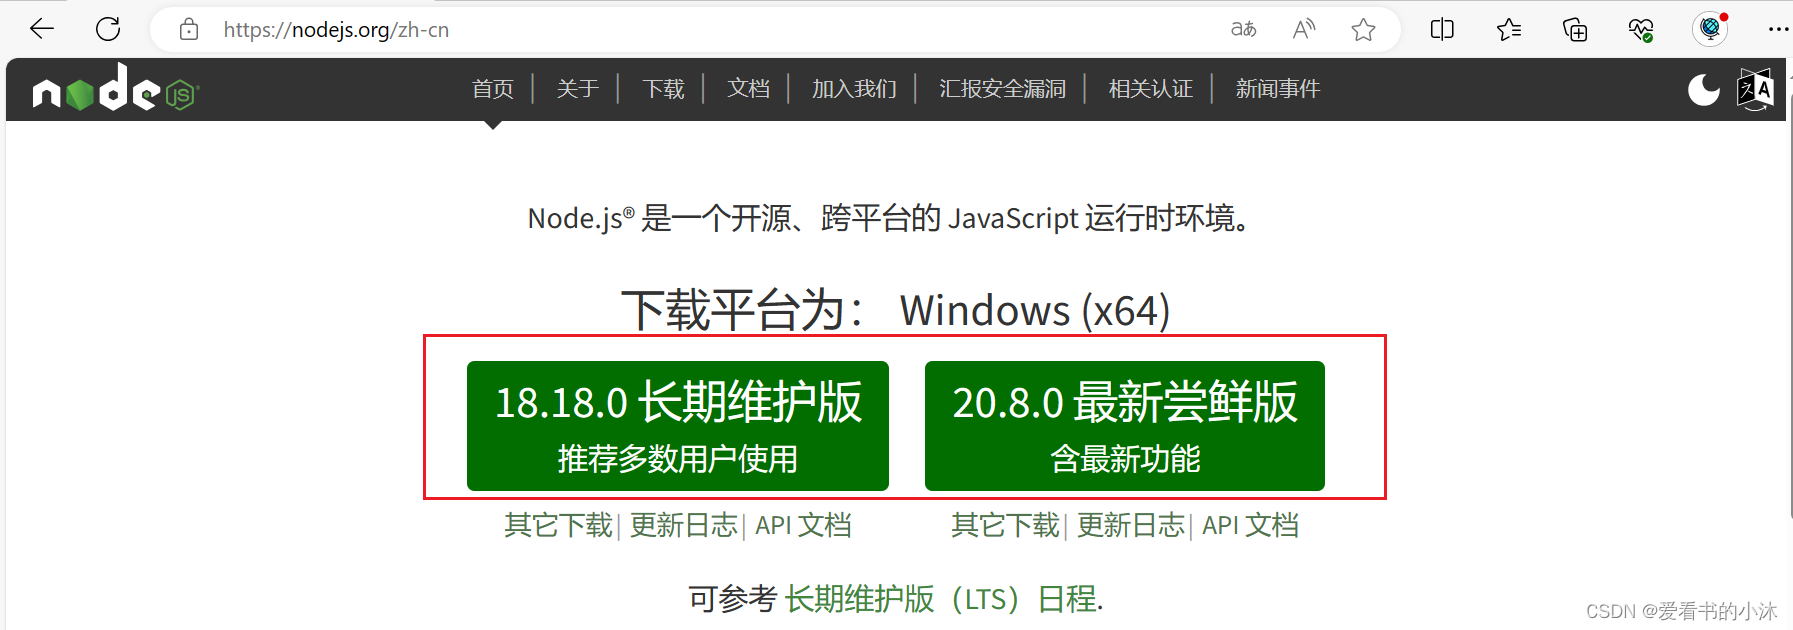
https://nodejs.org/zh-cn/download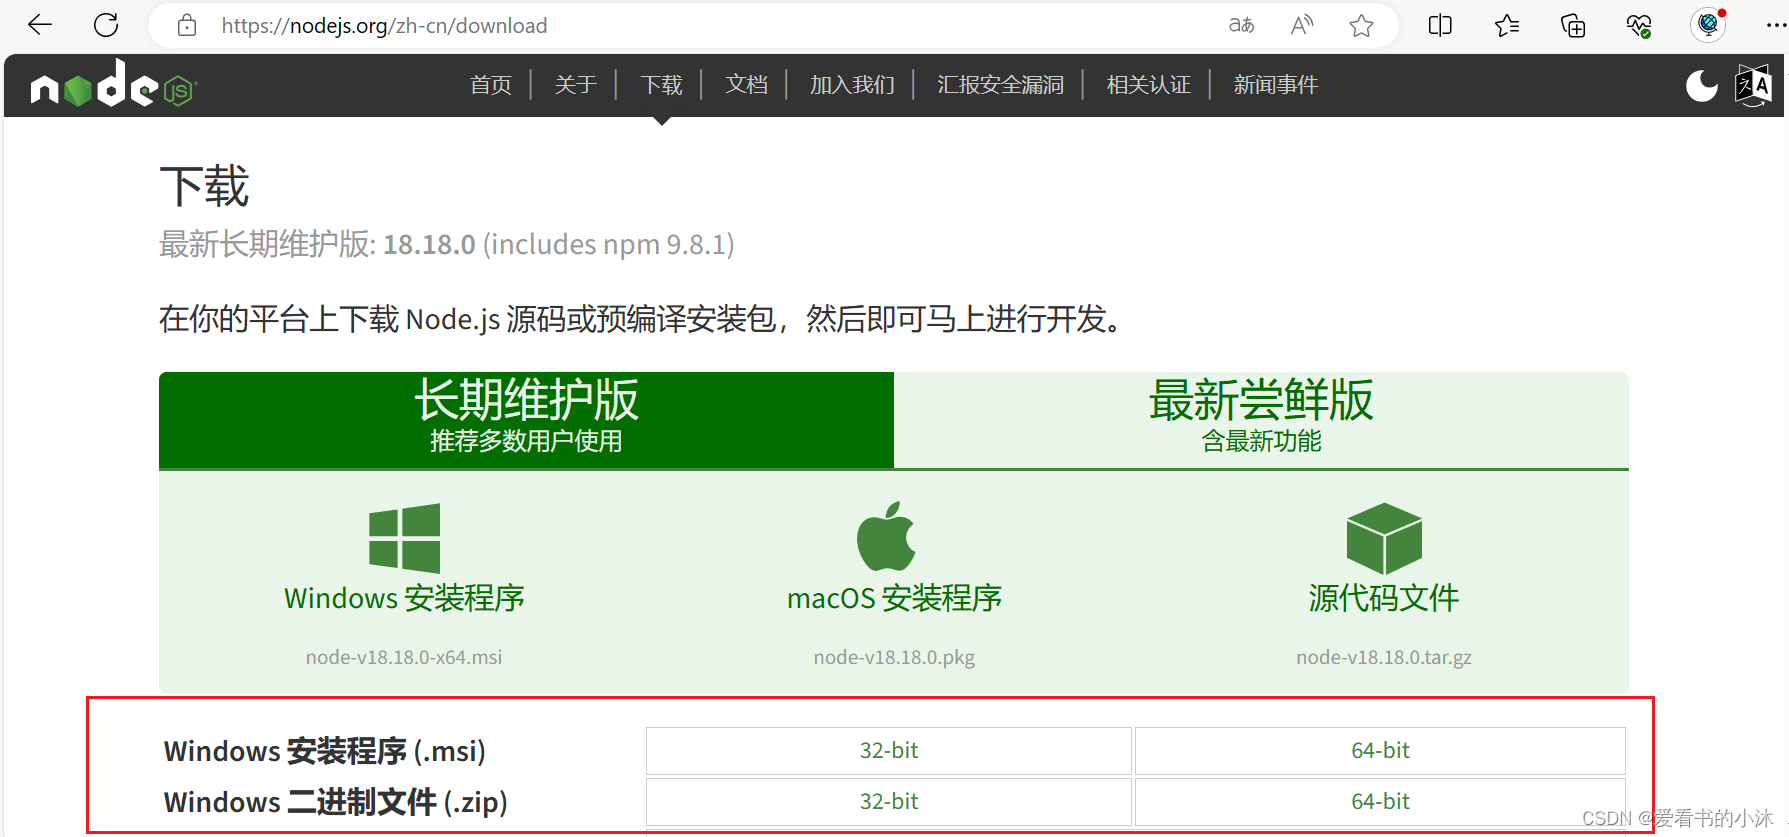
2.2 Protobuf
https://github.com/protocolbuffers/protobuf
https://github.com/protobufjs/protobuf.js
https://protobufjs.github.io/protobuf.js/
protobuf.js是一个纯JavaScript实现,支持Node.js和浏览器的TypeScript,它容易使用速度快速,可以直接反射.proto文件,不需要生成任何文件。
protobuf.js是基于ByteBuffer.js的Protocol Buffers纯JavaScript实现,主要功能是解析.proto文件,构建Message类,编码解码。
2.2.1 安装
npm install protobufjs [--save --save-prefix=~]
npm i -g protobufjs

# The command line utility lives in the protobufjs-cli package and must be installed separately:
npm install protobufjs-cli [--save --save-prefix=~]
2.2.2 工具
https://protobufjs.github.io/protobuf.js/#pbjs-for-javascript
#老版本
##使用pbjs命令将.proto文件转换为.js文件
./node_modules/protobufjs/bin/pbjs -t json msg.proto > msg.json

## 使用pbjs命令将.proto文件转换为.json文件
./node_modules/protobufjs/bin/pbjs -t static_module -w commonjs -o msg.js msg.proto

#新版本
npx pbjs  -t json message.proto --es6 "msg.js"
npx pbjs  -t json message.proto --ts "msg.ts"
而在node端,也可以打包成js文件来处理。但node端是服务端环境了,完全可以允许.proto的存在,所以其实我们可以有优雅的使用方式:直接解析。
使用pbjs命令将.proto文件转换为.json文件:
./node_modules/protobufjs/bin/pbjs -t json msg.proto > msg.json
./protobuf.js-protobufjs-v7.2.5/cli/bin/pbjs  -t json msg.proto > msg.json

- 命令行参数如下:
  -t, --target     Specifies the target format. Also accepts a path to require a custom target.

                   json          JSON representation
                   json-module   JSON representation as a module
                   proto2        Protocol Buffers, Version 2
                   proto3        Protocol Buffers, Version 3
                   static        Static code without reflection (non-functional on its own)
                   static-module Static code without reflection as a module

  -p, --path       Adds a directory to the include path.

  -o, --out        Saves to a file instead of writing to stdout.

  --sparse         Exports only those types referenced from a main file (experimental).

  Module targets only:

  -w, --wrap       Specifies the wrapper to use. Also accepts a path to require a custom wrapper.

                   default   Default wrapper supporting both CommonJS and AMD
                   commonjs  CommonJS wrapper
                   amd       AMD wrapper
                   es6       ES6 wrapper (implies --es6)
                   closure   A closure adding to protobuf.roots where protobuf is a global

  -r, --root       Specifies an alternative protobuf.roots name.

  -l, --lint       Linter configuration. Defaults to protobuf.js-compatible rules:

                   eslint-disable block-scoped-var, no-redeclare, no-control-regex, no-prototype-builtins

  --es6            Enables ES6 syntax (const/let instead of var)

  Proto sources only:

  --keep-case      Keeps field casing instead of converting to camel case.

  Static targets only:

  --no-create      Does not generate create functions used for reflection compatibility.
  --no-encode      Does not generate encode functions.
  --no-decode      Does not generate decode functions.
  --no-verify      Does not generate verify functions.
  --no-convert     Does not generate convert functions like from/toObject
  --no-delimited   Does not generate delimited encode/decode functions.
  --no-beautify    Does not beautify generated code.
  --no-comments    Does not output any JSDoc comments.

  --force-long     Enfores the use of 'Long' for s-/u-/int64 and s-/fixed64 fields.
  --force-message  Enfores the use of message instances instead of plain objects.

usage: pbjs [options] file1.proto file2.json ...  (or pipe)  other | pbjs [options] -
3、node 代码示例
3.1 HTTP
一旦你已经安装了 Node,让我们尝试构建第一个 Web 服务器。然后使用 node server.js 运行程序,访问 http://localhost:3000,你就会看到一个消息,写着“Hello World”。
- server.js
const http = require('http');
const hostname = '127.0.0.1';
const port = 3000;

const server = http.createServer((req, res) => {
  res.statusCode = 200;
  res.setHeader('Content-Type', 'text/plain;charset=utf-8');
  res.end('Hello World, 爱看书的小沐!2023!\n');
});

server.listen(port, hostname, () => {
  console.log(`服务器运行在 http://${hostname}:${port}/`);
});
运行脚本:
node server.js

浏览器访问http服务器:
http://127.0.0.1:3000/

var http = require('http');
var hostname = '127.0.0.1';
var port = 3000;

http.createServer(function(req, res) {
  res.writeHead(200, {'Content-Type': 'text/html'});
  res.write('<head><meta charset="utf-8"/></head>');
  res.write('<h1>Node.js</h1>');
  res.write('<b>爱看书的小沐!2023!</b>');
  res.end('<p>Hello World</p>');

}).listen(port);

console.log("HTTP server is listening at port ${port}.");
console.log(`服务器运行在 http://${hostname}:${port}/`);

3.2 UDP单播
UDP单播例子一
- 制作一个文件 (“demo_dgram.js”) 监听 8080 端口上的消息:
var dgram = require('dgram');
var s = dgram.createSocket('udp4');
s.on('message', function(msg, rinfo) {
  console.log('I got this message: ' + msg.toString());
});
s.bind(8080);
- 制作一个向 8080 端口发送消息的文件(“demo_dgram_send.js”) :
var dgram = require('dgram');
var s = dgram.createSocket('udp4');
s.send(Buffer.from('abc'), 8080, 'localhost');
UDP单播例子二
- 服务器:udp_server.js
// 例子:UDP服务端
var PORT = 9090;
var HOST = '127.0.0.1';

var dgram = require('dgram');
var server = dgram.createSocket('udp4');

server.on('listening', function () {
    var address = server.address();
    console.log('UDP Server listening on ' + address.address + ":" + address.port);
});

server.on('message', function (message, remote) {
    console.log(remote.address + ':' + remote.port +' - ' + message);
});

server.bind(PORT, HOST);

- 客户端:udp_client.js
// 例子:UDP客户端
var PORT = 9090;
var HOST = '127.0.0.1';

var dgram = require('dgram');
var message = Buffer.from('This is 爱看书的小沐!');

var client = dgram.createSocket('udp4');

client.send(message, PORT, HOST, function(err, bytes) {
    if (err) throw err;
    console.log('UDP message sent to ' + HOST +':'+ PORT);
    client.close();
});

3.4 UDP广播
- 服务器:boardcast_server.js
var dgram = require('dgram');
var server = dgram.createSocket('udp4');
var port = 8080;

server.on('message', function(message, rinfo){
    console.log('server got message from: ' + rinfo.address + ':' + rinfo.port);
});

server.on('listening', function () {
    var address = server.address();
    console.log('Boardcast Server listening on ' + address.address + ":" + address.port);
});

server.bind(port);

- 客户端:boardcast_client.js
var dgram = require('dgram');
var client = dgram.createSocket('udp4');
var msg = Buffer.from('hello world, 爱看书的小沐!');
var port = 8080;
var host = '255.255.255.255';

client.bind(function(){
    client.setBroadcast(true);

    // client.send(msg, port, host, function(err){
    //     if(err) throw err;
    //     console.log('msg has been sent');
    //     client.close();
    // });

    // 循环发送消息
    setInterval(function(){
        client.send(msg, port, host, function(err){
            if(err) throw err;
            console.log('msg has been sent');
        });
    }, 1000);

});

4、Protobuf 代码示例
4.1 例子: awesome.proto
- awesome.proto的内容定义如下:
// awesome.proto
package awesomepackage;
syntax = "proto3";

message AwesomeMessage {
    string awesome_field = 1; // becomes awesomeField
    string name_field = 2;
}
4.1.1 加载.proto文件方式
- 测试脚本文件:app_proto001.js
var protobuf = require("protobufjs");

protobuf.load("awesome.proto", function(err, root) {
    if (err)
        throw err;
    var AwesomeMessage = root.lookupType("awesomepackage.AwesomeMessage");

    var payload = { awesomeField: "AwesomeString" };

    var message = AwesomeMessage.create(payload);

    var buffer = AwesomeMessage.encode(message).finish();
});
var protobuf = require("protobufjs");

protobuf.load("awesome.proto", function(err, root) {
    if (err)
        throw err;

    // Obtain a message type
    var AwesomeMessage = root.lookupType("awesomepackage.AwesomeMessage");

    // Exemplary payload
    var payload = { awesomeField: "AwesomeString" };
    console.log("payload: " + JSON.stringify(payload));

    // Verify the payload if necessary (i.e. when possibly incomplete or invalid)
    var errMsg = AwesomeMessage.verify(payload);
    if (errMsg)
        throw Error(errMsg);

    // Create a new message
    var message = AwesomeMessage.create(payload); // or use .fromObject if conversion is necessary
    console.log("create: " + JSON.stringify(message));

    // Encode a message to an Uint8Array (browser) or Buffer (node)
    var buffer = AwesomeMessage.encode(message).finish();
    // ... do something with buffer
    console.log("encode: " + JSON.stringify(buffer));

    // Decode an Uint8Array (browser) or Buffer (node) to a message
    var message = AwesomeMessage.decode(buffer);
    // ... do something with message
    console.log("decode: " + JSON.stringify(message));

    // If the application uses length-delimited buffers, there is also encodeDelimited and decodeDelimited.

    // Maybe convert the message back to a plain object
    var object = AwesomeMessage.toObject(message, {
        longs: String,
        enums: String,
        bytes: String,
        // see ConversionOptions
    });
    console.log("toObject: " + JSON.stringify(object));
});
执行运行命令如下:
node app_proto001.js

4.1.2 加载.json文件方式
执行如下命令,将awesome.proto转为awesome.json:
./node_modules/protobufjs/bin/pbjs -t json awesome.proto > awesome.json
自动生成的awesome.json如下:
{
  "nested": {
    "awesomepackage": {
      "nested": {
        "AwesomeMessage": {
          "fields": {
            "awesomeField": {
              "type": "string",
              "id": 1
            },
            "nameField": {
              "type": "string",
              "id": 2
            }
          }
        }
      }
    }
  }
}
编写脚本代码如下:
var protobuf = require("protobufjs");

var jsonDescriptor = require("./awesome.json"); // exemplary for node

var root = protobuf.Root.fromJSON(jsonDescriptor);

// Obtain a message type
var AwesomeMessage = root.lookupType("awesomepackage.AwesomeMessage");

// Exemplary payload
var payload = { awesomeField: "AwesomeString", nameField: "AwesomeName"};
console.log("payload: " + JSON.stringify(payload));

// Verify the payload if necessary (i.e. when possibly incomplete or invalid)
var errMsg = AwesomeMessage.verify(payload);
if (errMsg)
    throw Error(errMsg);

// Create a new message
var message = AwesomeMessage.create(payload); // or use .fromObject if conversion is necessary
console.log("create: " + JSON.stringify(message));

// Encode a message to an Uint8Array (browser) or Buffer (node)
var buffer = AwesomeMessage.encode(message).finish();
// ... do something with buffer
console.log("encode: " + JSON.stringify(buffer));

// Decode an Uint8Array (browser) or Buffer (node) to a message
var message = AwesomeMessage.decode(buffer);
// ... do something with message
console.log("decode: " + JSON.stringify(message));

// If the application uses length-delimited buffers, there is also encodeDelimited and decodeDelimited.

// Maybe convert the message back to a plain object
var object = AwesomeMessage.toObject(message, {
    longs: String,
    enums: String,
    bytes: String,
    // see ConversionOptions
});
console.log("toObject: " + JSON.stringify(object));
运行结果如下:
4.1.3 加载.js文件方式
通过如下命令转为.proto为对应的.js文件
C:\Users\tomcat\Desktop\test>C:\Users\tomcat\Desktop\protobuf.js-protobufjs-v7.2.5\node_modules\.bin\pbjs -t static-module -w commonjs -o awesome.js awesome.proto
生成的awesome.js 部分内容如下: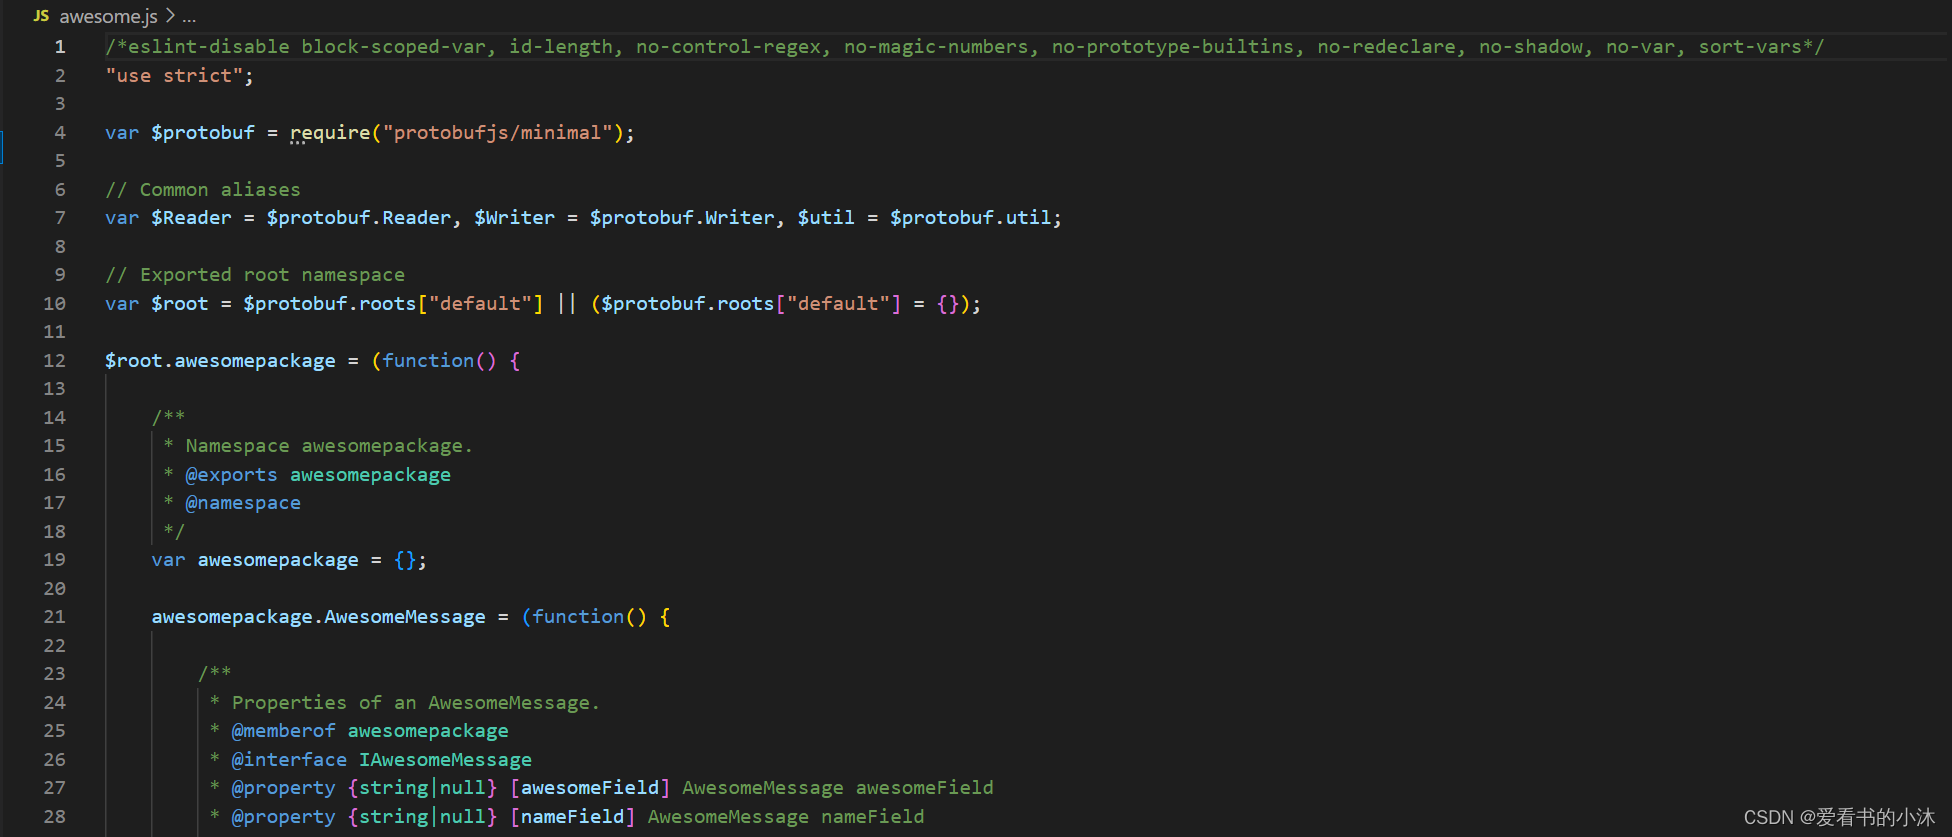
编写测试脚本代码如下:
var protobuf = require("protobufjs");

var awesomeProto = require("./awesome.js"); // exemplary for node
var AwesomeUtils = awesomeProto.awesomepackage.AwesomeMessage;

// Exemplary payload
var payload = { awesomeField: "AwesomeString", nameField: "AwesomeName"};
console.log("payload: " + JSON.stringify(payload));

// Verify the payload if necessary (i.e. when possibly incomplete or invalid)
var errMsg = AwesomeUtils.verify(payload);
if (errMsg)
    throw Error(errMsg);

// Create a new message
var message = AwesomeUtils.create(payload); // or use .fromObject if conversion is necessary
console.log("create: " + JSON.stringify(message));

// Encode a message to an Uint8Array (browser) or Buffer (node)
var buffer = AwesomeUtils.encode(message).finish();
// ... do something with buffer
console.log("encode: " + JSON.stringify(buffer));

// Decode an Uint8Array (browser) or Buffer (node) to a message
var message = AwesomeUtils.decode(buffer);
// ... do something with message
console.log("decode: " + JSON.stringify(message));

// If the application uses length-delimited buffers, there is also encodeDelimited and decodeDelimited.

// Maybe convert the message back to a plain object
var object = AwesomeUtils.toObject(message, {
    longs: String,
    enums: String,
    bytes: String,
    // see ConversionOptions
});
console.log("toObject: " + JSON.stringify(object));
运行脚本文件如下:
node app_awesome.js

4.2 例子:account.proto
- account.proto
// account.proto
package yxy;
syntax = "proto3";

message Account{
    required string name = 1; //帐号名
    required string pwd = 2; //帐号密码
}

message AccountList{
    required int32 index = 1;
    repeated Account list = 2;
}
4.2.1 create(…)创建对象
- app_account.js
var ProtoBufJs = require("protobufjs");
var root = ProtoBufJs.loadSync("./account.proto");
var AccountList = root.lookupType("yxy.AccountList");
var Account = root.lookupType("yxy.Account");
var accountListObj = AccountList.create();

for(var i = 0; i < 10; i++){
    var accountObj = Account.create();
    accountObj.name = "杨小羊_"+i;
    accountObj.pwd = "pwd_"+i;
    accountListObj.list.push(accountObj);
}

var buffer = AccountList.encode(accountListObj).finish();

console.log("data: " + JSON.stringify(accountListObj));
console.log("encode: " + JSON.stringify(buffer));
执行命令如下:
node app_account.js

4.2.2 fromObject(…)创建对象
var ProtoBufJs = require("protobufjs");
var root = ProtoBufJs.loadSync("./account.proto");
var AccountList = root.lookupType("yxy.AccountList");
var Account = root.lookupType("yxy.Account");

var accountObj1 = Account.fromObject({pwd:"666", name:"杨小羊"});
var accountObj2 = Account.fromObject({pwd:"777", name:"杨大羊"});
var accountObj3 = Account.fromObject({pwd:"888", name:"杨胖羊"});
var accountListObj = AccountList.fromObject({index:"0", list:[accountObj1,accountObj2,accountObj3]});
var buffer = AccountList.encode(accountListObj).finish();

console.log("data: " + JSON.stringify(accountListObj));
console.log("encode: " + JSON.stringify(buffer));
执行结果如下:
4.3 例子:hello.proto + udp
- hello.proto
package yxy;
message helloworld
{
    message helloReq { required string name = 1; }
    message helloRsp
    {
        required int32 retcode = 1;
        optional string reply = 2;
    }
}
4.3.1 服务端:yxy_server.js
- yxy_server.js
var ProtoBuf = require("protobufjs");
var dgram = require('dgram');
var PORT = 8080;
var HOST = '127.0.0.1';

var server = dgram.createSocket('udp4');
var root = ProtoBuf.loadSync("./hello.proto");
var HelloReq = root.lookupType("yxy.helloworld.helloReq");
var HelloRsp = root.lookupType("yxy.helloworld.helloRsp");

server.on('listening', function () {
    var address = server.address();
    console.log('UDP Server listening on ' + address.address + ":" + address.port);
});

server.on('message', function (message, remote) {
    console.log(remote.address + ':' + remote.port + ' - ' + message);
    console.log(HelloReq.decode(message) + ' from client!');

    var hCReq = HelloRsp.fromObject({retcode:200, reply:'Yeah!I\'m 杨小羊!'});
    var message = HelloRsp.encode(hCReq).finish();

    server.send(message, 0, message.length, remote.port, remote.address, function (err, bytes) {
        if (err) {
            throw err;
        }
        console.log('UDP message reply to ' + remote.address + ':' + remote.port);
    })
});

server.bind(PORT, HOST);

4.3.2 客户端:yxy_client.js
var dgram = require('dgram');
var ProtoBuf = require("protobufjs");
var PORT = 8080;
var HOST = '127.0.0.1';

var root = ProtoBuf.loadSync("./hello.proto");
var HelloReq = root.lookupType("yxy.helloworld.helloReq");
var HelloRsp = root.lookupType("yxy.helloworld.helloRsp");

var hCReq = HelloReq.fromObject({name:"杨小羊"});
var buffer = HelloReq.encode(hCReq).finish();
message = buffer;

var socket = dgram.createSocket({
    type: 'udp4',
    fd: PORT
}, function (err, message) {
    if (err) {
        console.log(err);
    }
    console.log(message);
});

socket.send(message, 0, message.length, PORT, HOST, function (err, bytes) {
    if (err) {
        throw err;
    }
    console.log('UDP message sent to ' + HOST + ':' + PORT);
});

socket.on("message", function (msg, rinfo) {
    console.log("[Client] Received message: " + HelloRsp.decode(msg).reply + " from " + rinfo.address + ":" + rinfo.port);
    console.log(HelloRsp.decode(msg));
    socket.close();
});

socket.on('close', function () {
    console.log('socket closed.');
});

socket.on('error', function (err) {
    socket.close();
    console.log('socket err');
    console.log(err);
});

4.4 例子:user.proto + tcp
- user.proto
syntax = "proto3";
package yxy;

message Login {
    required string name = 1;
    required string pwd = 2;
}
message Address{
  string province = 1;
  string city = 2;
  string country = 3;
}
4.4.1 服务端:yxy_tcpserver.js
- yxy_tcpserver.js
const net = require("net");
const protobuf = require("protobufjs");
const PORT = 9090;
const HOST = '127.0.0.1';

protobuf.load("./user.proto", (err, root) => {
    if (err) throw err;
    const LoginMessage = root.lookupType("yxy.Login");
    const server = net.createServer((socket) => {
        console.log("New client connected");
        socket.on("data", (data) => {
            // 解码数据
            const message = LoginMessage.decode(data);
            // 在这里处理消息
            console.log(message);
            // 编码响应
            const responseData = LoginMessage.encode({
                name: "杨小羊",
                pwd: "123456"
            }).finish();
            // 将响应写回到连接
            socket.write(responseData);
        });
        socket.on("close", () => {
            console.log("Client disconnected");
        });
    });
    server.listen(PORT, () => {
        console.log(`Server listening on localhost:${PORT}`);
    });
});

4.4.2 客户端:yxy_tcpclient.js
- yxy_tcpclient.js
const net = require("net");
const protobuf = require("protobufjs");
const PORT = 9090;
const HOST = '127.0.0.1';

protobuf.load("./user.proto", (err, root) => {
    if (err) throw err;
    const LoginMessage = root.lookupType("yxy.Login");
    const client = net.createConnection({
        port: PORT
    }, () => {
        console.log("Connected to server");
        // 编码数据
        const data = LoginMessage.encode({
            name: "爱看书的小沐",
            pwd: "666666"
        }).finish();
        // 将数据写到连接
        client.write(data);
    });
    client.on("data", (data) => {
        // 解码服务器的响应
        const message = LoginMessage.decode(data);
        // 在这里处理响应
        console.log(message);
    });
    client.on("close", () => {
        console.log("Connection closed");
    });
});
 文章来源:https://uudwc.com/A/20j5q
结语
如果您觉得该方法或代码有一点点用处,可以给作者点个赞,或打赏杯咖啡;╮( ̄▽ ̄)╭如果您感觉方法或代码不咋地//(ㄒoㄒ)//,就在评论处留言,作者继续改进;o_O???如果您需要相关功能的代码定制化开发,可以留言私信作者;(✿◡‿◡)感谢各位大佬童鞋们的支持!( ´ ▽´ )ノ ( ´ ▽´)っ!!!文章来源地址https://uudwc.com/A/20j5q