前言:学习Vue框架首先需要具备基本的HTML5、CSS3、JavaScript基础,了解基本概念以及用法再来学习Vue会事半功倍!
文章来源:https://uudwc.com/A/dMNE1
一、初识Vue
- Vue.js(读音 /vjuː/, 类似于 view) 是一套构建用户界面的渐进式框架。
- Vue 只关注视图层, 采用自底向上增量开发的设计。
- Vue 的目标是通过尽可能简单的 API 实现响应的数据绑定和组合的视图组件。
Vue2.下载链接:安装 — Vue.js
1、Vue的使用方式
1、直接下载并且通过script标签引入HTML页面
2、使用如下链接引入
-
Staticfile CDN(国内) : https://cdn.staticfile.org/vue/3.0.5/vue.global.js
-
unpkg:https://unpkg.com/vue@next, 会保持和 npm 发布的最新的版本一致。
-
cdnjs : https://cdnjs.cloudflare.com/ajax/libs/vue/3.0.5/vue.global.js
代码示例:
<!DOCTYPE html>
<html>
<head>
<meta charset="utf-8">
<title>VueTest</title>
<--引入VUE!-->
<script src="https://cdn.staticfile.org/vue/3.0.5/vue.global.js"></script>
</head>
<body>
</body>
</html>
文章来源地址https://uudwc.com/A/dMNE1
二、Vue基本语法
1、创建一个Vue App
const app=Vue.createApp({})2、创建并将其挂载到组件(标签)
const app=Vue.createApp({})
<!--创建一个div标签-->
<div id="hello-vue"></div>
<!--将app挂载到div上-->
Vue.createApp(app).mount('hello-div')
3、返回数据并且回显到页面
data() {
return{
message:‘hello!’
  }
}
4、完整示例
<!DOCTYPE html>
<html>
<head>
    <meta charset="UTF-8">
    <title>VueTest</title>
    <script src="https://cdn.staticfile.org/vue/3.2.36/vue.global.min.js"></script>
</head>
<body>
<div id="hello-vue">
    <h1>{{message}}</h1>
    <br>
    <p>{{name}}</p>
</div>

<script>
    const app=Vue.createApp({
        data()
        {
            return {
                message : 'Hello!',
                name:'Vue'
            }
        }
    })
 app.mount('#hello-vue')
</script>
</body>
</html>
结果:
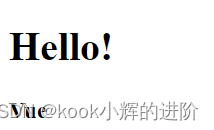
Tips:注意return后面的‘{’不能换行,否则会报错或者无法正常返回数据!
血的教训!!!
极其睿智且令人无语的语法规则!!
流汗黄豆.jpg
错误示例:X
data()
{
    return
  {
    message:‘hello’
  }
}
正确示例:
data()
{
    return {
    message:‘hello’
  }
}
5、添加方法
通过在创建的app里添加methods关键字来添加对于挂载的dom对象执行的方法
如果需要对组件进行事件的绑定就可以通过methods里的方法来实现
const app = Vue.createApp({
  data() {
    return { count: 4 }
  },
  methods: {
    increment() {
      // `this` 指向该组件实例
      this.count++
    }
  }
})
三、Vue的基本指令
Vue 指令(Directives)是 Vue.js 的一项核心功能,它们可以在 HTML 模板中以 v- 开头的特殊属性形式使用,用于将响应式数据绑定到 DOM 元素上或在 DOM 元素上进行一些操作。
Vue 指令是带有前缀 v- 的特殊 HTML 属性,它赋予 HTML 标签额外的功能。
与传统的 JavaScript 方法相比,使用 Vue 创建响应式页面要容易得多,并且需要的代码更少。
以下是几个常用的 Vue 指令:
| 指令 | 描述 |
|---|---|
v-bind |
用于将 Vue 实例的数据绑定到 HTML 元素的属性上。 |
v-if |
用于根据表达式的值来条件性地渲染元素或组件。 |
v-show |
v-show 是 Vue.js 提供的一种指令,用于根据表达式的值来条件性地显示或隐藏元素。 |
v-for |
用于根据数组或对象的属性值来循环渲染元素或组件。 |
v-on |
用于在 HTML 元素上绑定事件监听器,使其能够触发 Vue 实例中的方法或函数。 |
v-model |
用于在表单控件和 Vue 实例的数据之间创建双向数据绑定。 |
除了这些常用的指令,Vue 还提供了一些其他的指令,如 v-text、v-html 等,以及自定义指令,让开发者能够更加灵活地操作 DOM 元素。
1、指令的使用示例
1、v-model
使用v-model可以实现数据的双向绑定,而不需要使用JS进行繁杂的获取组件进行更新
<!DOCTYPE html>
<html>
<head>
<meta charset="utf-8">
<title>VueTest</title>
<script src="https://cdn.staticfile.org/vue/3.2.36/vue.global.min.js"></script>
</head>
<body>
<div id="app" class="demo">
    <input type="text" v-model="message">
    <p>{{ message }}</p>
</div>

<script>
const HelloVueApp = {
  data() {
    return {
      message: 'Hello Vue!!'
    }
  }
}

Vue.createApp(HelloVueApp).mount('#app')
</script>
</body>
</html>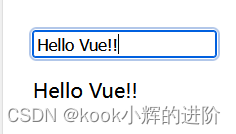
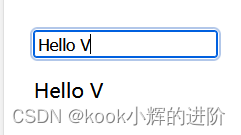
因此在对于数据进行修改时,会实时的进行响应和渲染!
2、v-bind
使用 v-bind 指令将 Vue 实例的数据绑定到 HTML 元素的属性上:
<!DOCTYPE html>
<html>
<head>
<meta charset="utf-8">
<title>Vue 测试实例 - 菜鸟教程(runoob.com)</title>
<script src="https://cdn.staticfile.org/vue/3.2.36/vue.global.min.js"></script>
</head>
<body>
<div id="app" class="demo">
    <img v-bind:src="imageSrc">
</div>

<script>
const HelloVueApp = {
  data() {
    return {
      imageSrc: 'https://static.runoob.com/images/code-icon-script.png'
    }
  }
}

Vue.createApp(HelloVueApp).mount('#app')
</script>
</body>
</html>
即可实现数据的绑定!
3、v-if and v-else
使用 v-if 和 v-else 指令根据表达式的值来条件性地渲染元素或组件:
<!DOCTYPE html>
<html>
<head>
<meta charset="utf-8">
<title>Vue</title>
<script src="https://cdn.staticfile.org/vue/3.2.36/vue.global.min.js"></script>
</head>
<body>
<div id="app" class="demo">
    <p v-if="showMessage">Hello Vue!</p>
    <p v-else>Goodbye Vue!</p>
</div>

<script>
const HelloVueApp = {
  data() {
    return {
      showMessage: true
    }
  }
}

Vue.createApp(HelloVueApp).mount('#app')
</script>
</body>
</html>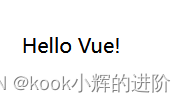
4、v-for
使用 v-for 指令根据数组的属性值循环渲染元素或组件:
<!DOCTYPE html>
<html>
<head>
<meta charset="utf-8">
<title>Vue</title>
<script src="https://cdn.staticfile.org/vue/3.2.36/vue.global.min.js"></script>
</head>
<body>
<div id="app" class="demo">
  <ul>
    <li v-for="item in items" :key="item.id">
      {{ item.text }}
    </li>
  </ul>
</div>

<script>
const HelloVueApp = {
  data() {
    return {
      items: [
        { id: 1, text: 'Item 1' },
        { id: 2, text: 'Item 2' },
        { id: 3, text: 'Item 3' }
      ]
    }
  }
}

Vue.createApp(HelloVueApp).mount('#app')
</script>
</body>
</html> 
5、v-on
使用 v-on 指令在 HTML 元素上绑定事件监听器:
<!DOCTYPE html>
<html>
<head>
<meta charset="utf-8">
<title>Vue</title>
<script src="https://cdn.staticfile.org/vue/3.2.36/vue.global.min.js"></script>
<style>
#app {
  border: dashed black 1px;
  display: inline-block;
  padding-bottom: 10px;
}

#app > button {
  display: block;
  margin: auto;
}

#lightDiv {
  position: relative;
  width: 150px;
  height: 150px;
}

#lightDiv > img {
  position: relative;
  width: 100%;
  height: 100%;
}

#lightDiv > div {
  position: absolute;
  top: 10%;
  left: 10%;
  width: 80%;
  height: 80%;
  border-radius: 50%;
  background-color: yellow;
}
</style>
</head>
<body>
<div id="app">
  <div id="lightDiv">
    <div v-show="lightOn"></div>
    <img src="https://static.runoob.com/images/svg/img_lightBulb.svg">
  </div>
  <button v-on:click=" lightOn =! lightOn ">开/关</button>
</div>

<script>
const app = Vue.createApp({
  data() {
    return {
      lightOn: false
    }
  }
})
app.mount('#app')
</script>

</body>
</html>
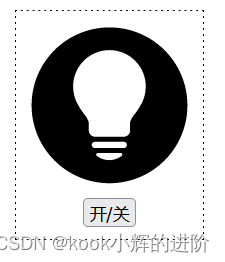
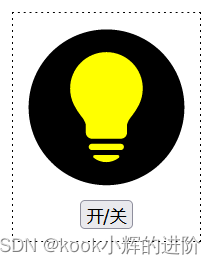
实现简单的开关灯,即切换背景颜色:
6、v-show
用于显示或隐藏组件
以下是一个使用 v-show 指令的示例:
<!DOCTYPE html>
<html>
<head>
<meta charset="utf-8">
<title>Vue(runoob.com)</title>
<script src="https://cdn.staticfile.org/vue/3.2.36/vue.global.min.js"></script>
</head>
<body>
<div id="hello-vue" class="demo">
    <button v-on:click="showMessage = !showMessage">显示/隐藏</button>
    <p v-show="showMessage">Hello Vue!</p>
</div>

<script>
const HelloVueApp = {
  data() {
    return {
      showMessage: true
    }
  }
}

Vue.createApp(HelloVueApp).mount('#hello-vue')
</script>
</body>
</html> 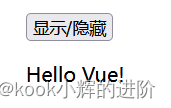
点击显示和隐藏!
发文不易,恳请大佬们高抬贵手!
点赞:随手点赞是种美德,是大佬们对于本人创作的认可!
评论:往来无白丁,是你我交流的的开始!
收藏:愿君多采撷,是大佬们对在下的赞赏!