一、使用postman工具调用服务接口
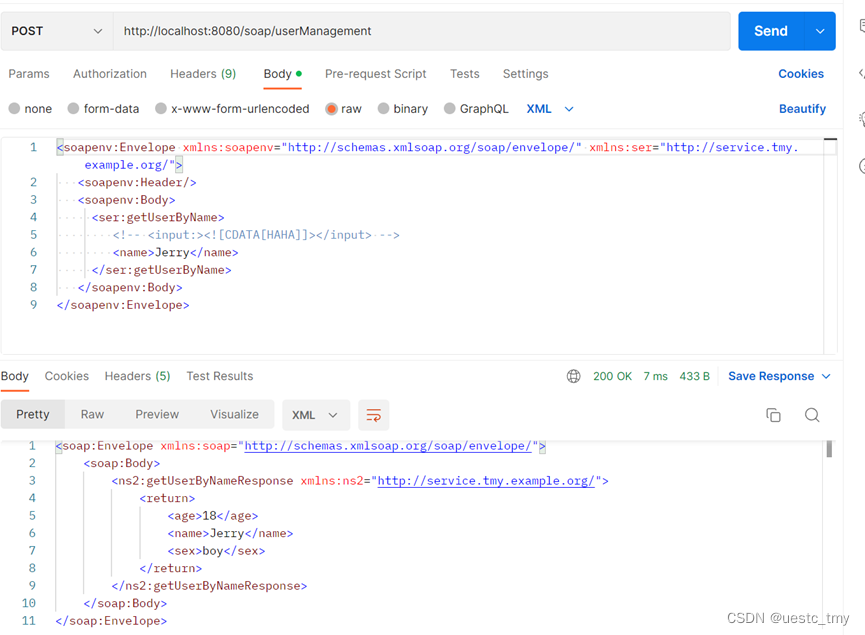
成功启动springboot应用后,使用postman新建POST请求,地址: http://localhost:8080/soap/userManagement
正文body选择raw,XML格式。
headers填入如下键值对:

其中xlms字段是 WSDL中的namespace字段。

<soapenv:Envelope xmlns:soapenv="http://schemas.xmlsoap.org/soap/envelope/" xmlns:ser="http://service.tmy.example.org/">
   <soapenv:Header/>
   <soapenv:Body>
     <ser:getUserByName>

        <name>Jerry</name>
     </ser:getUserByName>
   </soapenv:Body>
</soapenv:Envelope>
发送请求,返回了一个User类 。
至此,webservice SOAP服务发布测试成功。

二、使用客户端测试接口
新建客户端模块,maven依赖和服务端相同。
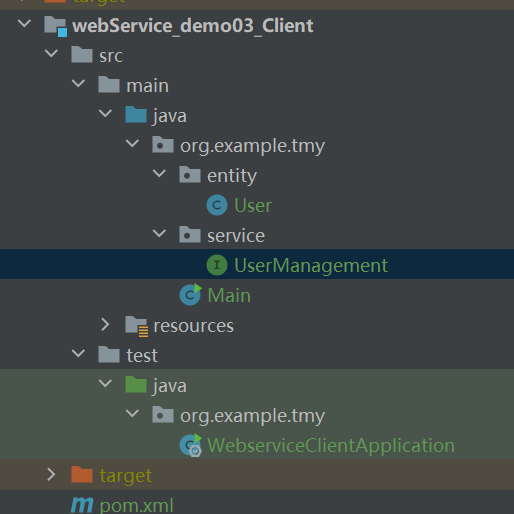
实体类User、服务接口UserManagement.java和服务端保持一致。
客户端结构如下:

测试类如下:
@SpringBootApplication
public class WebserviceClientApplication {
    public static void main(String[] args) {
        SpringApplication.run(WebserviceClientApplication.class, args);

        JaxWsDynamicClientFactory dcflient=JaxWsDynamicClientFactory.newInstance();

        Client client=dcflient.createClient("http://localhost:8080/soap/userManagement?wsdl");//http://localhost:8080/soap/userManagement

        System.out.println("client= "+client);
        try{
            //namespace= http://service.tmy.example.org/
            QName opname=new QName("http://service.tmy.example.org/","getUserByName");
            Object[] objects=client.invoke(opname,"Jerry");//getUserByName
            System.out.println("getUserByName 调用结果:"+objects[0].toString());


        }catch (Exception e){
            e.printStackTrace();
        }
    }
}
启动服务端后,运行客户端,返回了一个User类,说明客户端测试成功。
 文章来源:https://uudwc.com/A/vm9vj
文章来源地址https://uudwc.com/A/vm9vj

